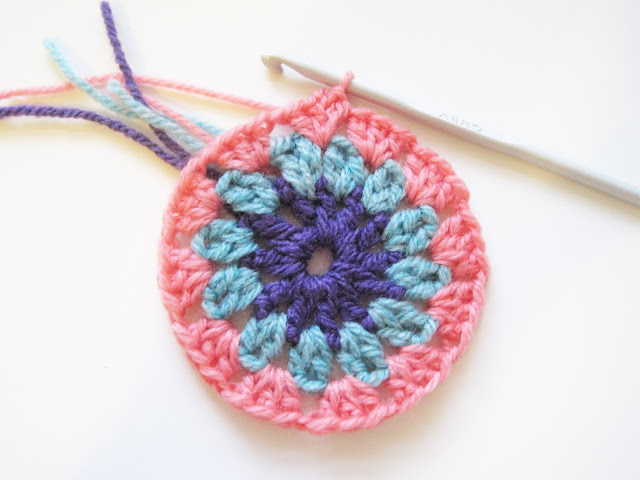
Crochet. I blooming love it. It's so fun and infinitely less stressful than knitting.
Whenever a present giving occasion arises, it is always my go-to craft. Five minutes on Pinterest and I've found a pattern and am on my way. Most recently, two of our friends got engaged (exciting!) and asked me to be bridesmaid at the wedding (double exciting!!). So, to say a simultaneous congrats and thank you, I decided to make them a little something.
6. In the next space - 3 double treble, 2 chain, 3 double treble, chain 1.
Whenever a present giving occasion arises, it is always my go-to craft. Five minutes on Pinterest and I've found a pattern and am on my way. Most recently, two of our friends got engaged (exciting!) and asked me to be bridesmaid at the wedding (double exciting!!). So, to say a simultaneous congrats and thank you, I decided to make them a little something.
Alison, the bride-to-be, is a fellow crochet-fiend, so I decided to make her some heart bunting for her fireplace - with a crochet twist. I made my bunting using this pattern by Bunny Mummy (she has some other lovely crochet tutorials over there - check it out!). Full credit for this pattern lands squarely with her. Fancy making your own? I've translated the pattern for the UK crafter.
Ready? Let's go! You'll need a 4mm crochet hook and 2 or 4 colours of DK yarn of your choosing. I opted for a purple, green, coral and cream combo - but you can choose whatever colours you like!
1. Chain 5 and join with a slip stitch.
2. Chain 4, then, working into the hole in the middle of the circle, (1 treble + 1 chain) x 11 times. (12tc).
3. Tie on your new colour. Again, this time you'll be working into the spaces. Chain 3 then work 1 treble. In the next 11 spaces work 2 treble crochets. (12 groups of 2 tc).
4. Tie in your next colour. Once again, working into the spaces, chain 3 then 2 treble crochets. In the following 11 spaces, work 3 trebles. (12 groups of 3 tc).
5. Tie in your last colour. Chain 1, 1 treble, chain 1.
6. In the next space - 3 double treble, 2 chain, 3 double treble, chain 1.
7. In the third space, 3 half double treble, chain 1.
8. In the next 3 spaces, 3 treble, chain 1.
9. In the seventh space, 1 half double treble, 2 double treble, chain 2, 2 double treble, 1 half double treble, chain 1.
10. In the next 3 spaces, 3 treble, chain 1.
11. In the eleventh space, 3 half double treble, chain 1.
12. In the twelfth space, 3 double treble, chain 2, 3 double treble, chain 1.
13. In the first space you worked in, 1 treble, 1 slip stitch.
Right that's you nearly done, just one more round to go - it's starting to look a bit heart shaped now...
14. OK, same colour, first space - 2 slip stitch, 1 half treble, chain 1.
15. Second space, 3 treble, chain 1, 1 treble, 1 half double treble, 1 double treble, chain 1.
16. Third space, 5 double treble, chain 1.
17. Fourth space, 1 double treble, 1 half double treble, 1 treble, chain 1.
18. In the next 3 spaces, 3 treble, chain 1.
19. Eighth space, 3 treble, chain 2, 3 treble, chain 1.
20. In the next 3 spaces, 3 treble, chain 1.
21. Twelfth space, 1 treble, 1 half double treble, 1 double treble, chain 1.
22. Thirteenth space, 5 double treble, chain 1.
23. Penultimate space, 1 double treble, 1 half double treble, 1 treble, chain 1, 3 treble, chain 1.
24. In your final space, 1 half treble, 2 slip stitch.
And you're done, 1 crocheted heart. Weave in your ends et voila! Beautiful.
What you do now is up to you. You could attach a ribbon to the middle and hang them individually. You could use them as patches. I chose to make them into a garland. I did this simply by creating a long chain, picking up stitches on the hearts every time I wanted to join one on. Before I did this, I took Bunny Mummy's advice and covered the hearts in starch spray just to stiffen them a bit.
 |
| I got a bit carried away - I could have made hundreds of these! |
 |
| Aren't they pretty? |
And here's the finished article, in situ, on Alison's fireplace (or 'Laura's Gallery' as she affectionately calls it! Can you spy a Pixel Portrait on there?).
So, anyone feeling inspired to make one of their own? I'd love to see!


These are so pretty ! :) Thank you for the tutorial!
ReplyDeleteNo problem! So pleased you like them!
ReplyDelete